Here's another list...more to come tomorrow!
$5 for each of the following sets:
Wonderful Weaves
Alphadot Numbers
By Design
A Little Love
Send a Celebration
Much Appreciated
Hearts & Clovers
Burst into Bloom
Fresh Fillers
Smorgasborders
Flower Filled
Mini Messages
Friendship Blooms
On the Spot
Polka Dots & Paisley
Holiday Basics
Fun Phrases
Fresh Flowers
Delight in Life
$10 each for each of the following sets:
Through the Year
For a Friend
Favorite Greetings
Eat Cake
In Any Event
Watercolor Minis (NEW)
Hearts & Posies (NEW)
Mini Mates
Ornamental Elements
Loving Hearts
Bold Shapes
A Greeting for All Reasons
Frolicking Frogs
Flower Garden
Quick Cards
Something to Celebrate
Phrase Starters
Sweet of You
$15 each for each of the following sets:
Alphadots
Year After Year
Classic Caps Alphabet
What Could Be Better
Outrageous Alphabet
Friday, August 15, 2008
More needy stamps
Posted by Dianna at 9:22 PM 0 comments
Labels: Stamping stuff for sale
Thursday, August 14, 2008
Looking for an adoptive home for many stamps!
Won't you please help me in my search for happy adoptive homes for some of my retired, yet beloved, stamp sets?
My matchbox of a stamp room is overflowing with stamping fun stuff...I need to selectively send some items on their way...Here's the start of several lists to come:
$5 for any of the following that you'd like to adopt into your happy stamproom:
Happiest of Holidays - GONE!
Sparkling Season
Word by Word - GONE!
Glorious Garlands
All About Occasions (stamp set only) - GONE!
Frosty - GONE!
Alphabits
Event Full
All I Have Seen
Love Without End
Very Punny
$10 for the following:
I'm Here
Headline Alphabet
Cheery Chat
Flaky Friends - GONE!
Many Thanks - GONE!
Looks Like Spring
Greetings Galore
Shipping on these is $5 for the first set, and any more sets may fit into the same flat-rate envelope or it could bump your shipping up to the flat-rate box. You can Paypal me or give me a check/money order. If you come pick them up, shipping is, of course, non-existent! :O)
Posted by Dianna at 9:34 PM 0 comments
Labels: Stamping stuff for sale
Wednesday, August 13, 2008
How to make a coil pop-up card
Some convention-going demos posted samples using a coil to make pop-ups inside & I decided to try my hand at one, too! It was quick, easy, and looked pretty cool! I'm looking forward to playing more with this idea...here's the first (of many, I hope!) of my coil pop-up cards:
I used all retired colors along with Only Orange for the card base. I punched big stars out of Cool Carribean & stamped with small stars tone-on-tone and used a little Tempting Turqoise for the greeting.
I made the pop-up "mechanism" for inside the card...just cut out a big circle with your Coluzzle or any jumbo punch you might own & cut a freehand spiral into the center. You'll have to leave a big enough spot in the center to add adhesive & then add a little adhesive on the opposite side of the circle on the end of the "tail" of the spiral.
Check it out! I just added punched out stars using the big and small star punches from Stampin' Up & a little glitter here & there, of course!

Can anyone name those colors? Probably you guessed Purely Pomegranate & Cool Carribean, but the green goes way back before the In Colors were even a glint in Stampin' Up's eye...anyone else remember Luscious Lime? Yeah, I'm such a hoarder that I still have a stash of Luscious Lime cardstock (and just finally parted with the ink pad!)...discontinued back in 2000 along with the ever-hated Rocket Red!
I made this card for my friend & fellow demo, Patty Bennett who was just named to SU's advisory board...and maybe even more importantly, she gave me a catalog to tide me over until my shipment arrives! :-P
Posted by Dianna at 9:23 PM 2 comments
Labels: Tutorials
Monday, July 28, 2008
...and God bless Santa...
That was Lucy's prayer tonight when Gene was putting her to bed. No, she didn't stop at that! She then went on to say, "God bless Santa so he can bring me presents. And more presents." No wonder Gene was laughing as he left her tonight!
...and the following photos are what happen when underwear go awry!
Here's a movie star version of the underwear-on-the-head boy! I think he looks like an old washer woman without his glasses.
It's an underwear party!
Here's our stamping samples for today! My friend Beckie sent this card to Lucy & boy was she excited! I thought I'd snap a shot of it before she loved it too hard & it stopped resembling the card that came from the envelope. Isn't it cute? I love this layout! It was an SCS layout challenge a couple of weeks ago & I have loved seeing all the variations of this card.
And this card was one I did at our little stamp club gathering last week. It uses the black magic technique...so easy & wow! It's super shiny & glam in person, but in this photo, you'll just have to trust me. I stamped the image in white craft ink & heat set it (I didn't have time to let it air dry). Color with colored pencils (I used metallics) in a quick & imprecise manner...don't worry about coloring to the edges. Then just outline it in white gel pen! Easy peasy! My favorite part? Color quickly & without filling the whole image. :O)
And this last round of pictures is to show off my latest craze! I went to Goodwill & picked up a bunch of wool sweaters to shrink down/felt and then make them into diaper covers for Henry & Joey who have a serious need of something to cover their bums.
I also had a wool shawl from a fellow freecycler. I shrank it down & made it into this:
I used the leftovers to make a waistband for a cool cover for Joey:
I just love those stripes and the use of the turtleneck collar for his leg holes...here he is showing it off for the camera!
And here he is in one of his nifty fleece covers that I've been making:
Posted by Dianna at 9:00 PM 0 comments
Labels: Family
Friday, July 18, 2008
What have we been doing?
Where have I been? I've been crazy since last weekend! We got through with Lucy's party on Saturday...can you believe she's three?! and since then, I've been busy cleaning/decluttering and working on making more diaper covers for my boys who have *literally* gotten too big for their britches. See what I've done:
Cake...
...and more cake! Lucy wanted the fancy dressed-up doll cake, but we needed more cake than just that one, so I did a castle for the rest of the princesses. And, yes, I know you're supposed to use the bigger doll. Lucy had a choice between one large Barbie-sized princess or the whole set of mini princesses & decided that more really was more!
Here's the birthday girl being sung to.
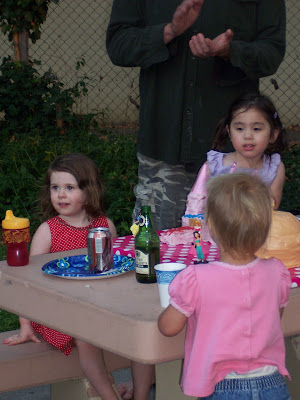
Lucy, our little princess, had to put her *beautiful* new Cinderella gown on ASAP! Here's she's trying on the ring that came with the dress.
Here's Henry...he's just too cute to leave out of a family brag blog post! He's starting to like to hold things - especially this hedgehog!
Caught in the act of eating the hedgehog! The first time I heard him gnawing on the hedgie, I thought Lucy was smothering him, but he's just figuring out that he can really go to town on his little hedgie friend.
...and here's what I finished tonight! Let's hope that they fit the boys as well as I'd like them to fit! I had to fix up the Thomas diaper cover, so it looks a bit different, but I know it'll be Joey's favorite anyway. He LOVES Thomas! Henry has a blue cover with teddies embroidered on it & then there's the wildman Joey diaper on the right. I couldn't resist the zebra fleece since it was on the clearance/remnants rack. I'm such a sucker for fabric! I swear I'd still be in the store drooling over the colors, textures, and possible projects available if Lucy hadn't been buggin' me that she was thirsty! Posted by Dianna at 11:59 PM 0 comments
Labels: Family
Saturday, July 12, 2008
Mount Your Stamps to Limit Shadows
One advantage of having stamps you get to mount is that you can cut them however you choose! I love to cut pretty closely so that I get the least amount of shadow possible when stamping later.
When I got my new Totally Tabs stamp set (Yeah!!!!), I noticed that there was A LOT of open space on some of the stamps, so I cut the big spots as closely as I could and ended up with this:
Pretty good? Well, it still bothered me that the top stamp in the picture had a pretty large open space with rubber that *shouldn't* get inked but probably would be inky when I used it. What to do? With a small snip, snip...
I cut both ends of the narrow piece & peeeeeeeeled it right off the block so that it couldn't bother me any more!
Ta da!!
You can see that I then went on to do this same step to two of the other stamps in the set (see below).
Have you been wondering to yourself, "Self, why didn't she just cut those pieces off before she mounted the stamps?" Well, if I had cut out those pieces of rubber first, it would have been MUCH tougher to get the stamp on the wood properly...those rounded ends are supposed to line up perfectly with my round tab punch, so could just put them on the block *anywhere* - they had to be in the right spot with the right spacing.
This is just a quick & tricky way to get your stamps mounted with the minimal effort. Hopefully this will help someone out! If your stamps are already mounted & you wished you had done this, you can unmount them if needed by microwaving them for about 10 seconds, remove the rubber, do what you need to do & remount them. They'll be sticky enough still, and if your block is still sticky where there no longer is rubber to cover it, you can use some Goo Gone or (if you're lazy like me!) just dust on some cornstarch or baby powder to stick to the sticky stuff. :O)
Posted by Dianna at 12:01 AM 0 comments
Labels: mounting stamps, Tutorials
Friday, July 11, 2008
Box in a Bag
I love this box in a bag project! I've seen them around on SCS and on some of the blogs I love to frequent & finally had a chance to try one out one evening when Henry finally fell asleep. It was so easy! I won't try to describe the steps because the lady who started this recent craze (I'm pretty sure she started it, at least!) has a wonderful tutorial, so if you're interested, there's a box in a bag tutorial here.
Posted by Dianna at 10:28 PM 0 comments
Labels: 3-d

